Showing posts with label ideas. Show all posts

Thursday, October 23, 2014

Faux Stone Tile Painted Backsplash In The Kitchen

I needed a backsplash update in my kitchen.  Last year we got new countertops, and I knew I wanted to do something different to the walls and backsplash area as well.  I was hoping to get stacked stone or stone mosaic tile, but it didn't work out.  Next, I looked into using tin ceiling panels, an idea I had seen online.  At the same time I had begun to experiment with faux painting, and while searching for more backsplash ideas, I found a couple of blogs where people had painted their backsplashes to look like stone.  During Spring Break I decided to try mine.

I used a stencil to help with mine, though many people just tape off the area with painter's tape.  I looked this morning to find the website and stencil I used to share with you, and can't find it.  It was a tile stencil, and it had large diamonds on one overlay, with smaller ones to fill in the empty spaces in between on the top overlay.  I ended up doing only the large diamond shapes.

For paint I used my trusty Lowe's and Home Depot paint samples.  I LOVE those things.  I have so many of them I'd be ashamed to admit the number.  You see I am addicted to paint and paint colors. Really!  And spray paint. 

I wasn't doing any blogging yet so only have a few before and afters to share.  I took these to share with my husband who was away on the tug at the time.


Step 1:  Taping off the top of the countertop and the bottom of the cabinets.


Step 2:  Measuring and Getting Started.  I wanted a full design at the end of the counter next to the fridge, so I started there and worked backwards to the window over the sink.  This picture is after it was dry and I was cleaning up, but you get the idea.  On the other end of this wall I started with a full design starting at the corner and traveling toward the sink.  This worked out well for me.  In the picture you can see my stencil, the natural sea sponges I used to do the painting, and some of my little sample pots.  I used 6 different colors layered on top of each other for this faux granite effect.  The colors were a light cream, beige, medium tan, two different browns, and black.  I used the beige as the base, then the tan, then the browns, and highlighted with the cream and black.  It matched up really great with my countertops.


Step 3:  Getting in the groove.  In the corner on the oven wall, I started with another full design and worked to the left.   Please ignore the mess and dirty dishes in the sink.  Let me warn you if you decide to try this - it IS NOT a quick project.  This took me all of one day and evening (with breaks for paint drying time) and a little bit the next morning.


Step 4:  This summer I decided to change out my hardware to copper and add copper accents.  This project was one of my first blog posts.


Remember the light I got and didn't like the color of, so decided to add more copper accents.  Here is what it looks like now.


Now that I have lived with it a while, I am considering going back and doing the second overlay to add the accent "diamonds".  If I do, I am thinking to do them in a darker black based shade to help tie in the black appliances.  (like this combo I did on my scarred up living room end table top). What do you think?


Friday, October 17, 2014

No Carve Decorated Pumpkins

Last year was my first year to try a painted pumpkin.  I tried a paisley monogrammed version patterned after a picture I saw on Google.  It turned out pretty cute - especially after I dressed it up with a big black bow on the top.


You see "no carve" pumpkin ideas popping up more and more on blogs, Pinterest, and Google.  This year there are a ton of ideas that I want to try.  Here are a few example pics I have collected.  All are from Google image search:


Lace Wrapped Pumpkins:


Spray Painted and Stencil Painted:


Push Pin, Button, and String Decorated


Hopefully a few of these ideas will soon be showing up on my front step.  What are you going to do with your pumpkin this year?    I saw this recipe while searching pumpkins and it looks delicious, so while I am sharing things to try with pumpkins, why not try this?


Chocolate Chip Pumpkin Bread Link from Taste Of Home

Thursday, October 9, 2014

More Thrift Store Fix Ups


Last night I decided to clean up the mess on my kitchen table by doing some crafts.  Funny but true! A lot of the stuff on the table was craft supplies that came in the shipments I got earlier this week. Let me say again how much I love online shopping.  When you live on an island and can get things shipped right to your door, instead of having to take a 45 minute boat ride, then a car ride to the store, lug the packages around with you, load them on a boat, and bring them home in a golf cart it's a blessing!  

You might remember some of these items from my Hospice Thrift Shop post (picture 1) and Good Will Finds post (picture2)


I have been posting a little along as I get them fixed up and repurposed.  It's still a work in progress, but things are starting to come together and many of them are showing up as part of my fall decor.


This pic shows some of the supplies I need to find a place for so my table can be used to eat once again.  Hmmm, why spend time searching for a place to shove store them when you can just make a few crafts and use them up instead.  Plus crafting is so much more relaxing after a hard teaching day than cleaning, so I deserve it.  (Sounds good doesn't it).

So here were go...

Here is the black stoneware vase from Good Will, filled with some red and brown berry stems and sporting the bow that tied up the box of acorns and pinecones in the picture above. I think the vase was $4, the berry stems were $2.99 and the bow was free.  I think its pretty cute for less than $7 and is actually much bigger than it looks in the picture.  It's going on the bottom shelf of my console table.


The rest of the little box of acorns and pinecones and some of the straw (which I got on sale for 60% off so less that $5 ! ) went into the little mixing bowl on my buffet.  The blessings chalkboard tray was one of those from the Hospice Shop I spray painted with Rust-oleum antique copper and chalkboard paint.  The little ceramic pumkins were a Dollar Tree score at $1 each, the flower and fall leaf picks were also from Dollar Tree, I wrapped the stems in some jute twine. The Welcome sign and ceramic gourd goose are down from the attic.  They both came from Terry's Village a couple of years ago.  I LOVE that goose.


Next I went to work on the wall pocket I found at Good Will.  I got a lot of fall florals on sale from Joann's online and if you spent a certain amount you got free shipping.  Needless to say, I spent that certain amount, and it was really easy to do, too (am happy to have found Joann's).  I was just starting to arrange them in the wall pocket when I finally remembered I was supposed to do a before and after.  So here is a (semi) before and the after.  


I  had planned for this to go on my front door like this pic from a blog I love Thrift Decor Chick.  But I really liked how it turned out and I noticed it matched the colors in my breakfast room really well, so can you guess where it is now?


The twin iron candle holder I decided to leave "rustic shabby" for now.  It looks nice on my hall bench some of my other attic treasures.  Picture 1 shows the cleaned up cropped version of the photo, Picture 2 shows the real bench scene with all our shoes and usually a few book bags thrown underneath.  


Don't you love fall decorations?  I think they are my favorite. Well I better get back to crafting I mean cleaning.  Bye for now!

Wednesday, October 8, 2014

Jute Wrapped Crafts

Hi!  It's been a couple days, because I have fallen WAY behind in my house cleaning / laundry / school homework duties.  Truthfully, I'm still there - so this will be a rather short post tonight.  Part of what has put me behind (other than feeling lazy - I won't lie) is a big shipment of craft supplies I got on Monday, which were followed by more on Tuesday afternoon.  It's taken me a couple of days to get them sorted out (also to clean up because sadly a couple of items came broken).

I have been seeing a lot of blog and Pinterest posts about items wrapped with jute twine.  I thought I might want to try some, so I placed an order for a few things to try in with my supplies that arrived this week.  So far here are my first two attempts:

a jute ball light - it's a jute wrapped battery candle stuck in a twine ball.  It's actually pretty cute in person...in the photo, not so much.


and a jute wrapped welcome candle


Here are some other cute jute wrapped ideas I have been thinking of trying:  (all items from Google Image)


Love the birds.  Must get a bird stencil.

Very cute, and I have some key charms from my jewelry, though not this big.


Well I'm afraid that's about it for now, but before I go I want to share with you something funny I came across on a blog while looking at craft ideas for Fall.  This was on www.suburbanturmoil.com, where she shared ideas for crafts she would NOT be doing this fall season - with funny little suggestions as to why they were off her crafting list.


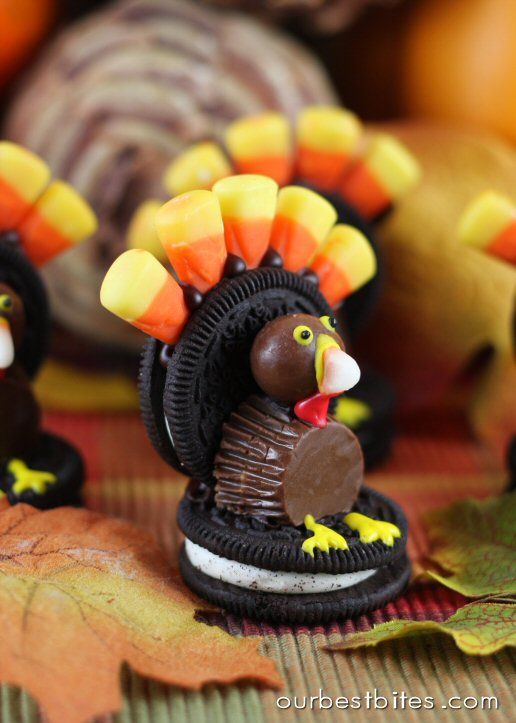
Oreo-Cookie-Turkeys
Lorelei admitted to the other moms that she stayed up all night making Oreo Cookie Turkeys for her son’s kindergarten class.
This explains why she wept so loudly when they ate them.
- See more at: http://suburbanturmoil.com/17-pinterest-thanksgiving-crafts-i-will-never-make/2013/11/25/#sthash.uSaAuaeM.dpuf

This was my favorite.  Can you imagine how much work that would take?  Cute idea though, you've got to admit (but slightly creepy too).

Thanks for checking out my blog!  Do you have any jute wrapped crafts you want to share?  Please leave a comment.

Wednesday, October 1, 2014

New Style Stenciled Walls

Are you addicted to Houzz.com?  It's one of my favorite sites, along with Facebook, Pinterest, and Ebay.  My friend Sharon turned me on to this website, and I almost wish she hadn't, because its one of those where you can spend hours looking at other people's house layouts, paint schemes, decorations, and style.  I think Houzz is where I first developed my obsession with all white kitchens (and boy are there some pretty ones on there!).

Another thing I have seen on Houzz recently, and I also see popping up on blogs is whole wall stenciling.  These are not border stencils like the kind that were popular 18 years ago when we built our house, but total wall ones that have a wallpaper effect when painted on the wall.  At first I didn't think I liked them much, but they have grown on my considerably, and now I am ready to try one.

Here is the one I am thinking of trying.  My plan is to do one wall in my master bedroom as an accent wall.  Right now I have pale gray paint in there with one white accent wall and white trim.  I am thinking to stencil that white wall using the gray color I have on the other walls.  


It would almost be a reverse of the picture.  I like this stencil because it is not as busy as I have seen. This one is available for purchase on Etsy (another favorite website I forgot to mention).  Here is a link:  Large Wall Stencil Idea

If you would like to see a tutorial on how to use these large wall stencils, there is a good one at this blog link:  Wall Stenciling @ Southern Hospitality Blog


Here are some other pictures of stenciled walls I have grabbed off the web:


If done right I think it would look really good, but it's going to be tricky.  I think it could get out of hand and too busy in a hurry.  The good thing about paint, though, is if you really don't like it when you're done you just get your paint back out and go right over top of it.

What do you think of paint stenciled walls?

Sunday, September 28, 2014

October is Coming!

October is almost here!  Fall is really starting to roll along now.  Kids (and teachers) are back in the swing of things down to school.  The weather is getting cooler, and windows are being opened.  On Tangier lots of waterfowl are beginning to pass through.  The last of the tourist season is winding up.

Here are some fun things to welcome October in.  


First some more free font links.  


Cute fonts with an October theme:

 Link to Misfits font download


 Link to Wild Wood font download


Link to Witched font download


And here were two new ones posted this week that will be nice for crafts and lettering:


 Link to As Long As You Love Me font download

Link to Chalk It Up font download


Next, a pretty October poem to inspire us:


OCTOBER


Crispy air and azure skies, 
High above, a white cloud flies, 
Bright as newly fallen snow.
Oh the joy to those who know October! 

Colors bright on bush and tree.
Over the weedy swamp, we see
A veil of purple and brown and gold.
Thy beauty words have never told. October! 

Scolding sparrows on the lawn, 
Rabbits frisking home at dawn, 
Pheasants midst the sheaves of grain, 
All in harmony acclaim, October! 

Brown earth freshly turned by plow, 
Apples shine on bended bough, 
Bins o'erflowed with oats and wheat, 
And satisfaction reigns complete. October! 

Radiant joy is everywhere.
Spirits in tune to the spicy air, 
Thrill in the glory of each day.
Life's worth living when we say, October!

by  Joseph Pullman Porter


And last a recipe to make us fat.  LOL


If you read my post Deep In Amish Country, at the bottom I mentioned some things that are our favorites to buy at Mrs. Lapp's farm stand.   One of the items was Whoopie Pies.  If you are not familiar with Amish or Pennsylvania Dutch cooking you might night know what these strange sounding things are. They are actually small cakes (or fat cookies) which are put together with a sweet filling, kind of like a giant Oreo.  There are different flavors of both the cakes and fillings.  Chocolate with white filling is traditional.  I have also had chocolate with peanut butter filling.  In a word, they are yummy!  Here is a link to a fall Whoopie Pie recipe (courtesy of Martha Stewart) that sounds delicious: